New Outlook
1
Run Outlook from the Start menu
2a
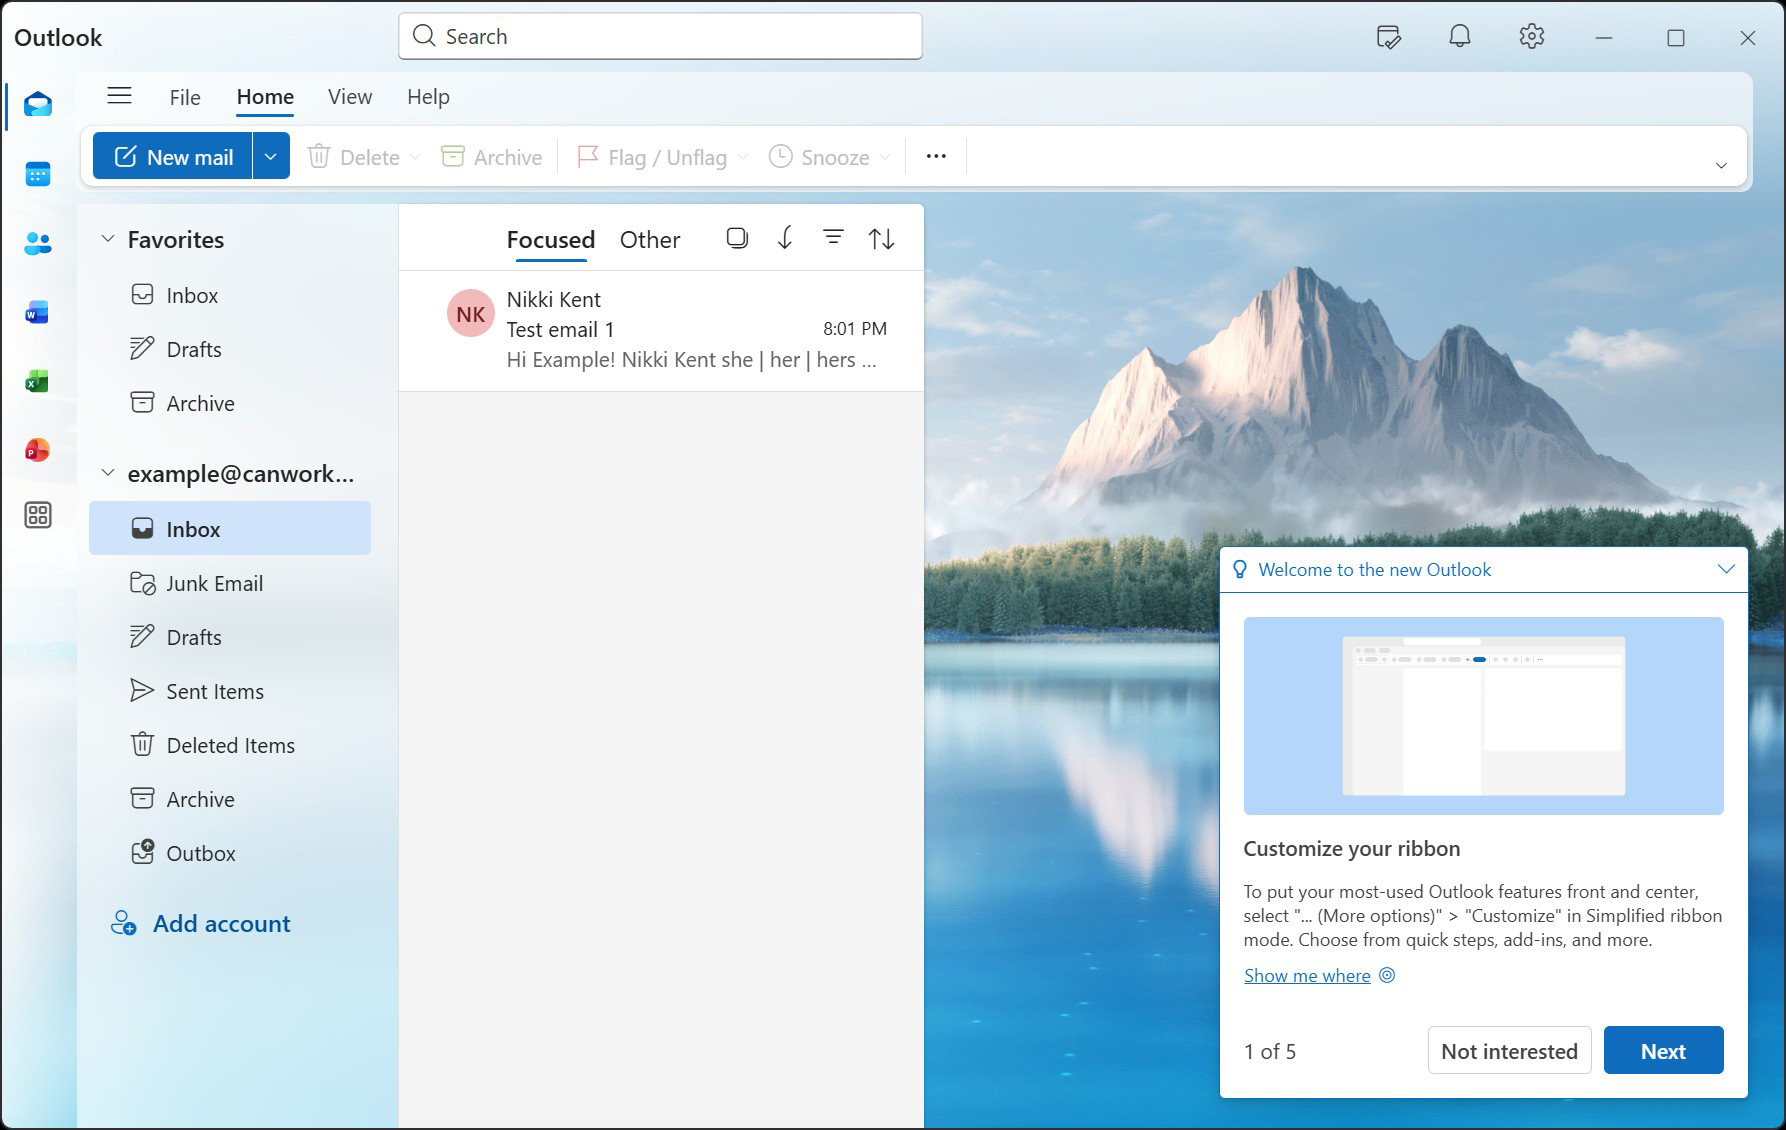
First Time Running
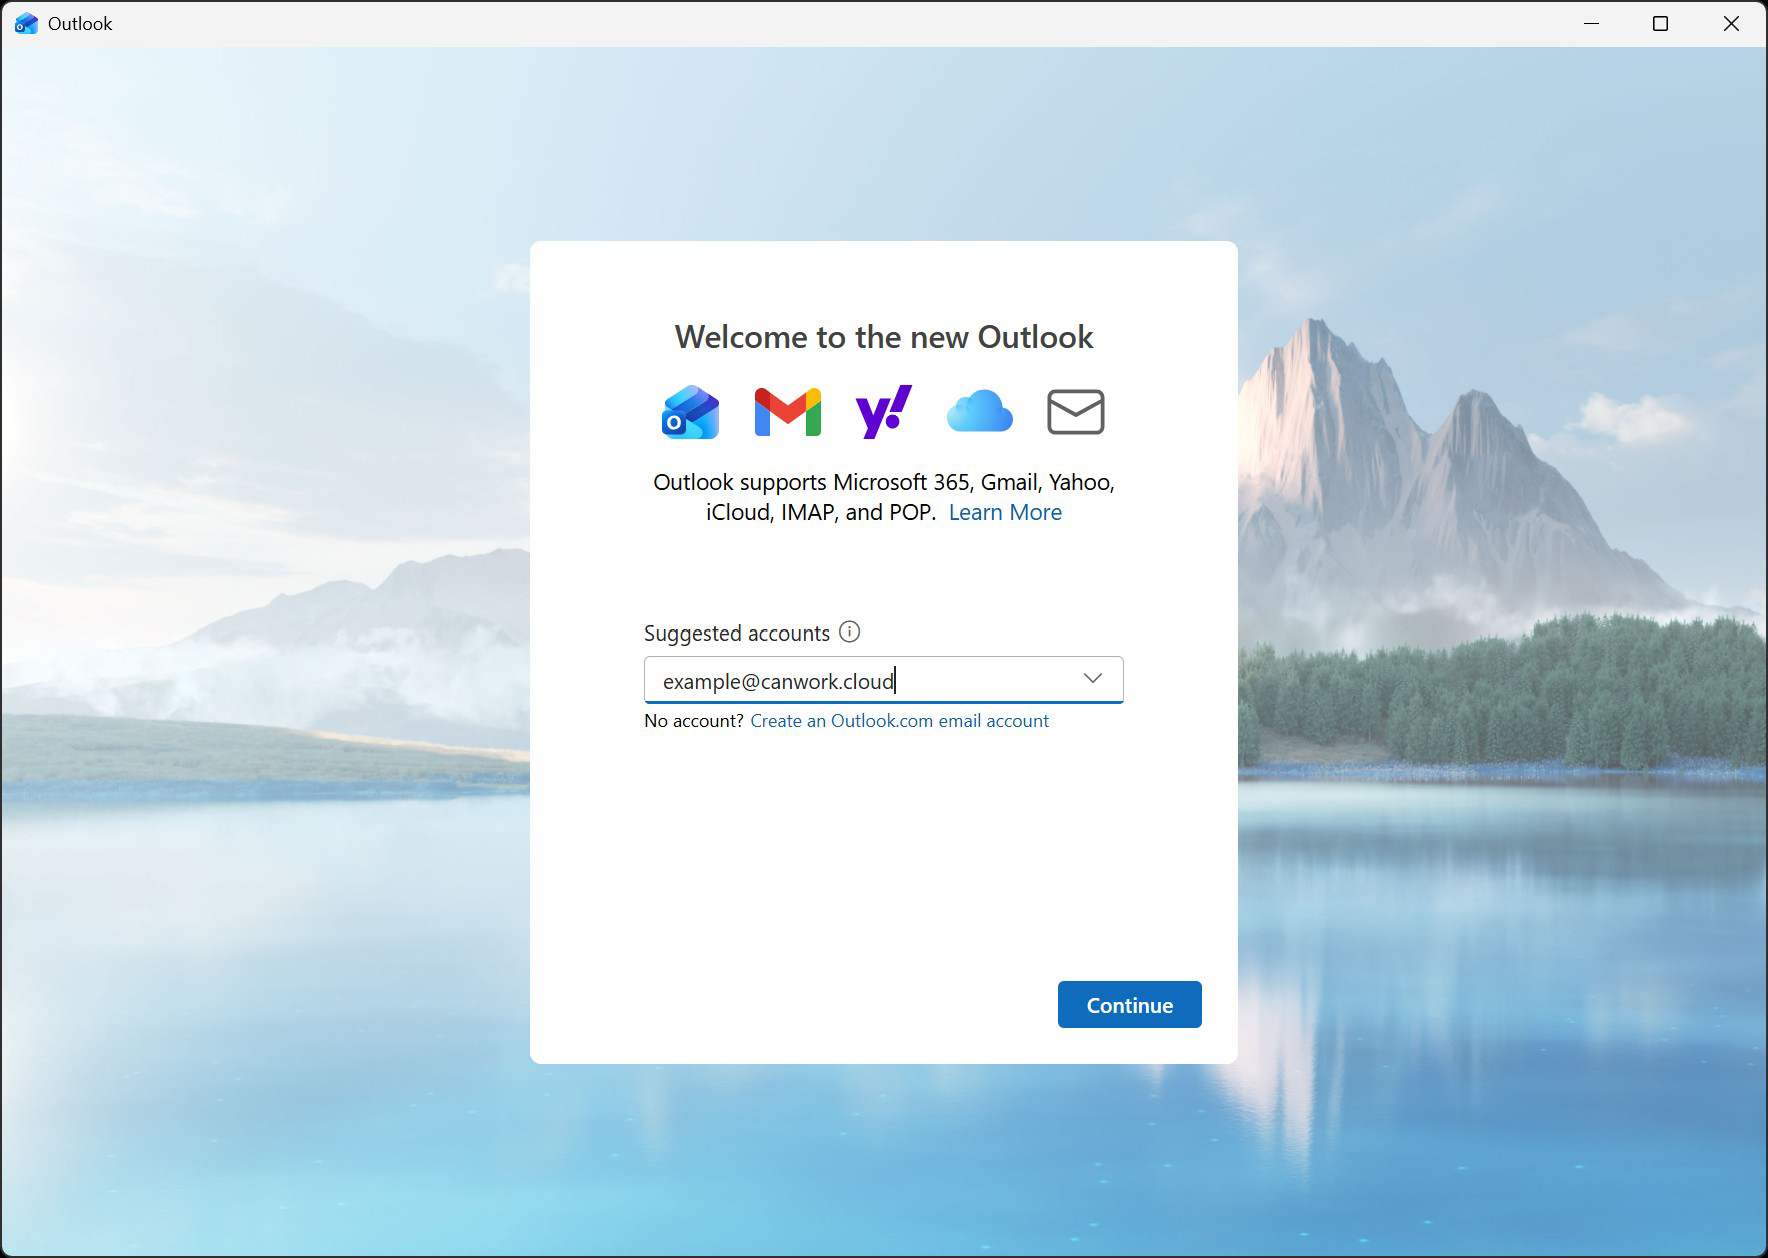
If this is your first time running it, you’ll see “Welcome to the new Outlook” and a place to enter your email address.
Otherwise press the Settings icon (Gear icon) and click “Add New Account“.
2b
Existing Outlook User
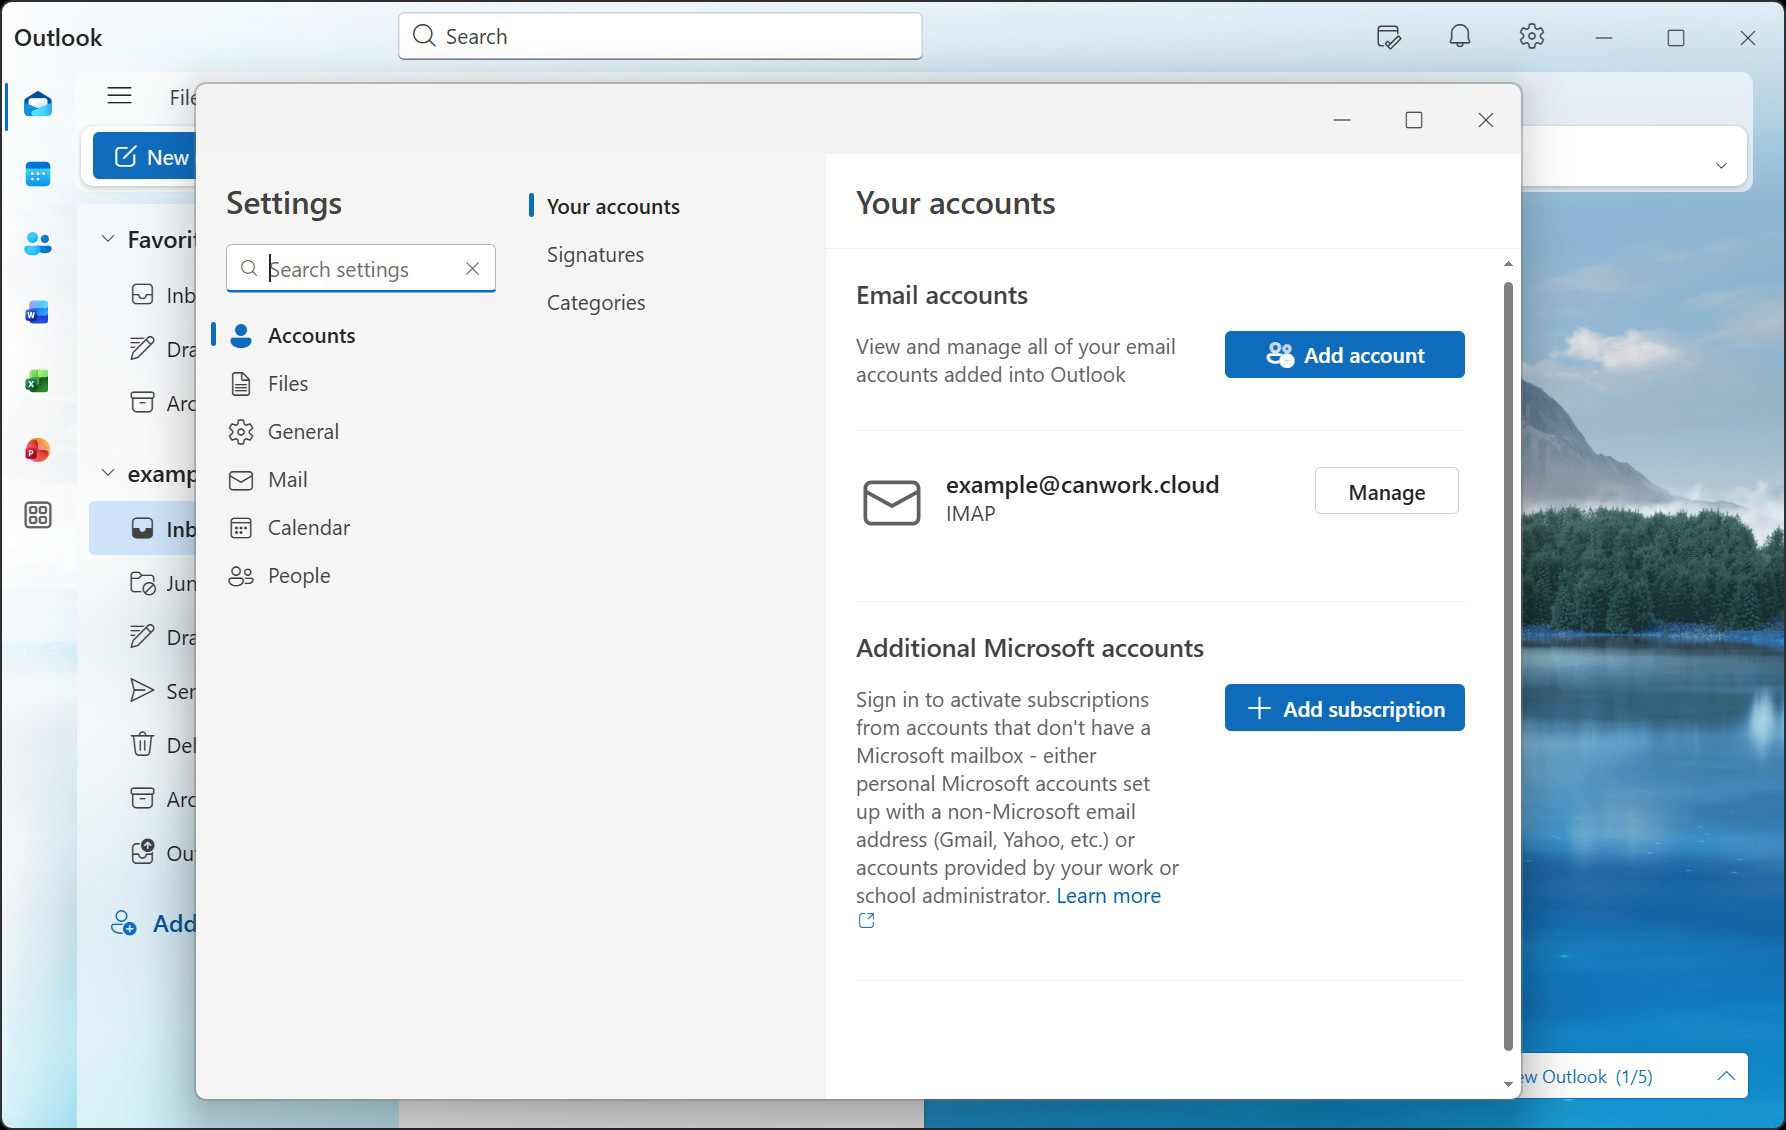
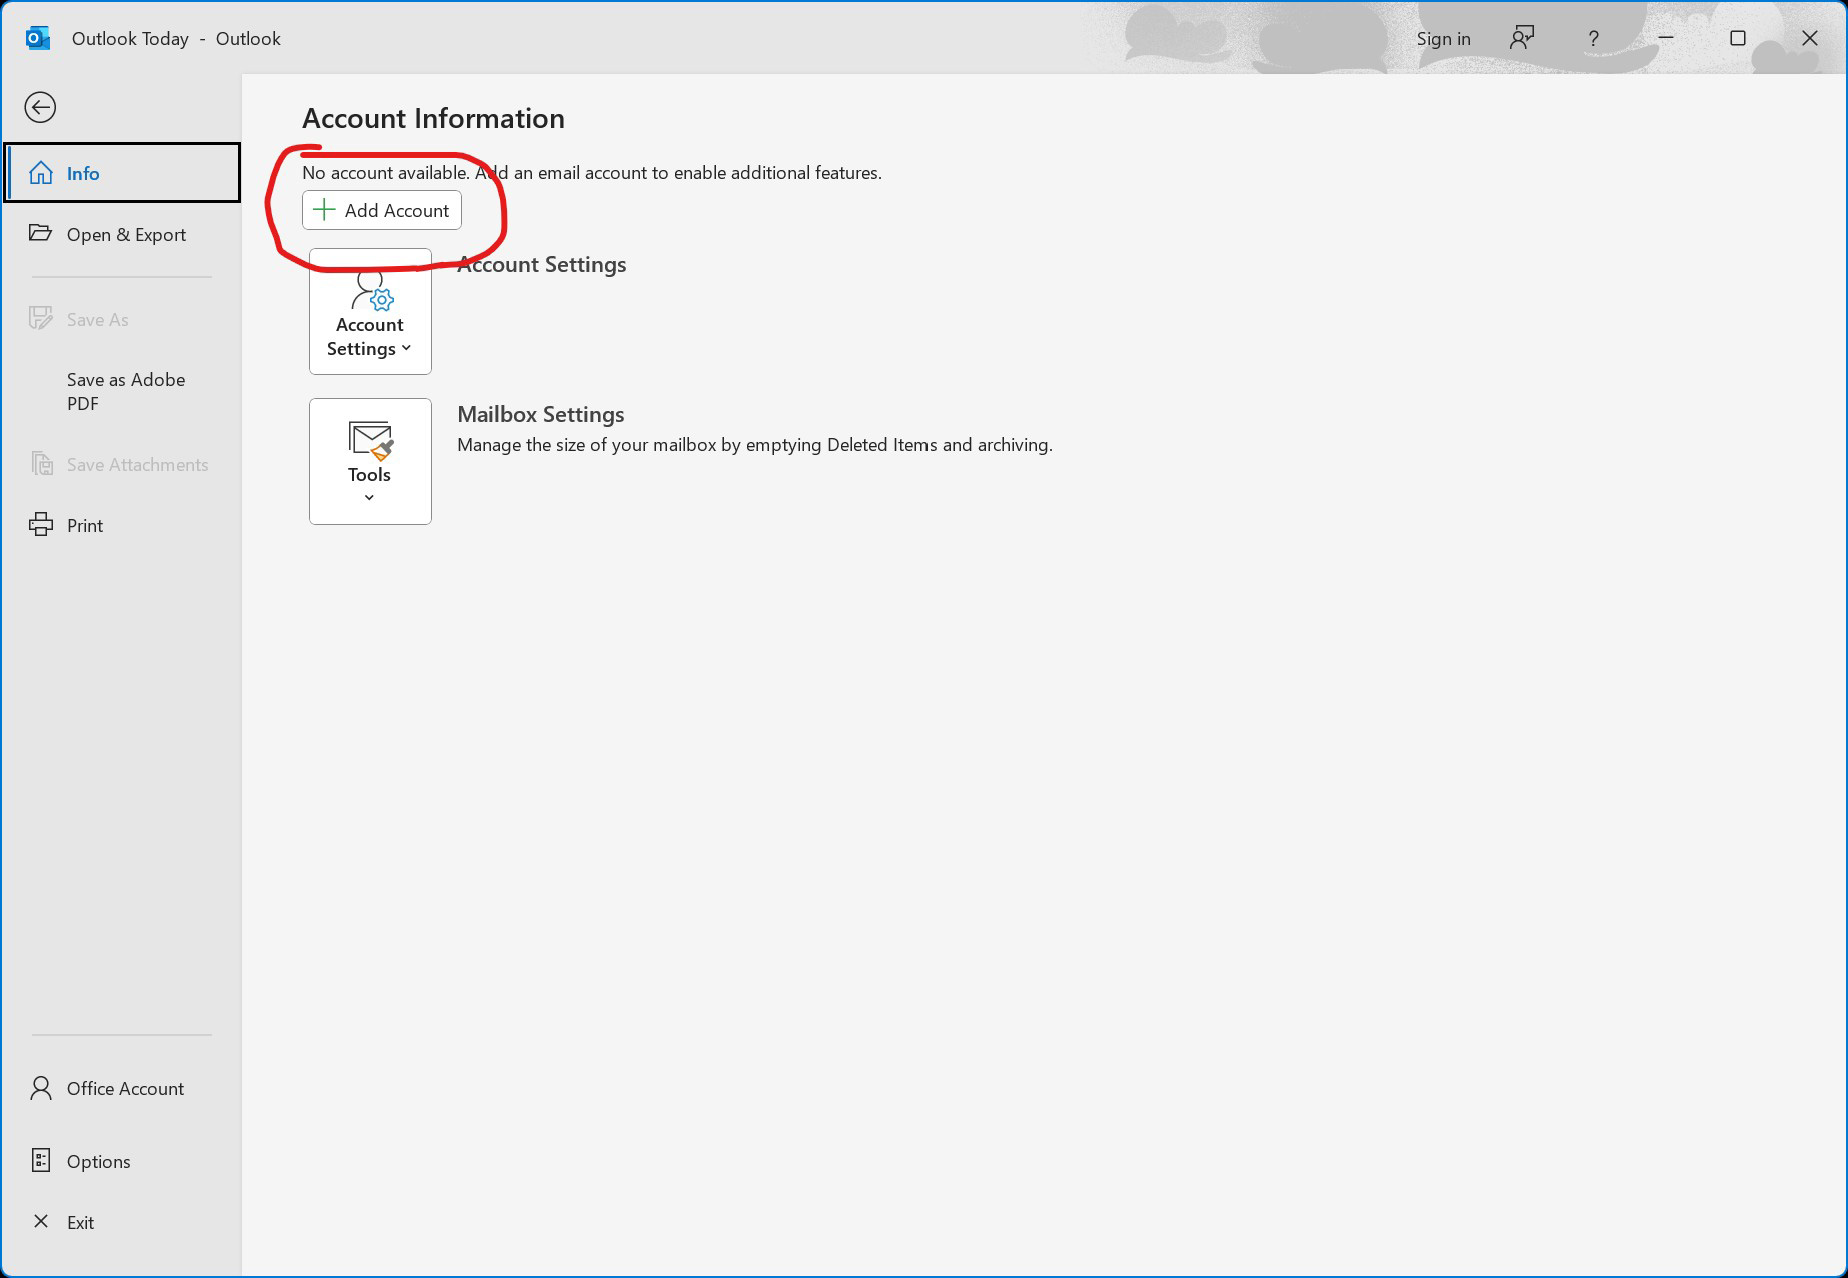
Once Outlook opens, use the settings icon (a gear) to access the Settings dialog.
You should start in the “Accounts” section on the left menu – click “Add account” to start.
3a
- Enter your password
- Select “Show more“
- De-select “Use recommended settings” and set as follows:
- * IMAP Incoming server: ctmail.ct.coop
- * Port: 993
- * Secure connection type: SSL/TLS (recommended)
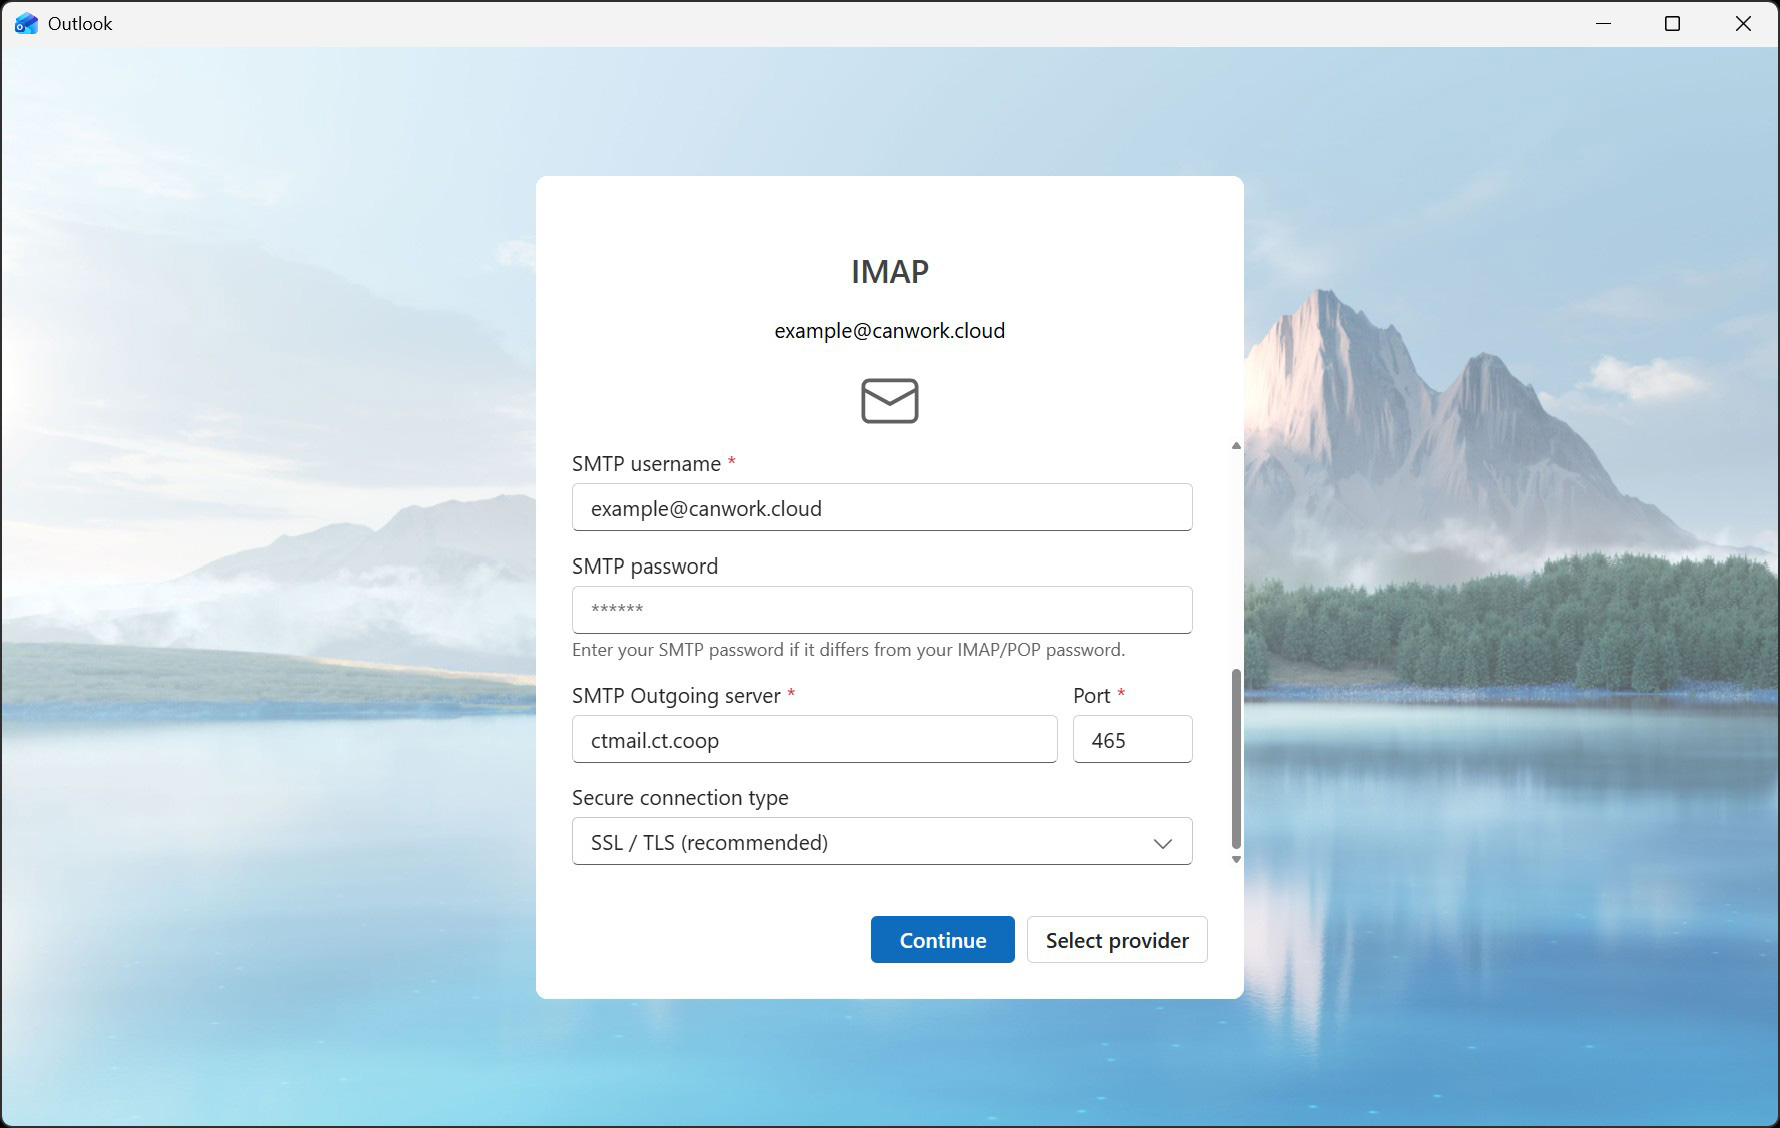
Scroll down and also fill out “SMTP Information

3b
SMTP Configuration:
- * SMTP username:
- * SMTP password
- * SMTP Outgoing server: ctmail.ct.coop
- * Port: 465
- * Secure connection type: SSL/TLS (recommended)
Press Continue
takes you to step next dialog “Sync your imap account”
4
Sync your IMAP account
Press Continue
*This is where it will show you if it’s wrong.
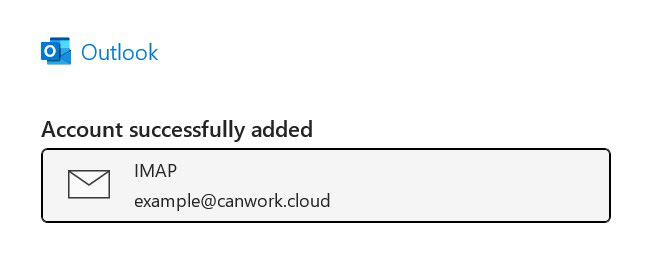
It will say “Setting Things Up“, then “Add all your Accounts” and finally the account should be added.

5
Test inbound and outbound email to another email address!
Outlook Classic
1
Run Outlook Classic
2
Click the “File” menu and then choose the “+ Add Account” button
3
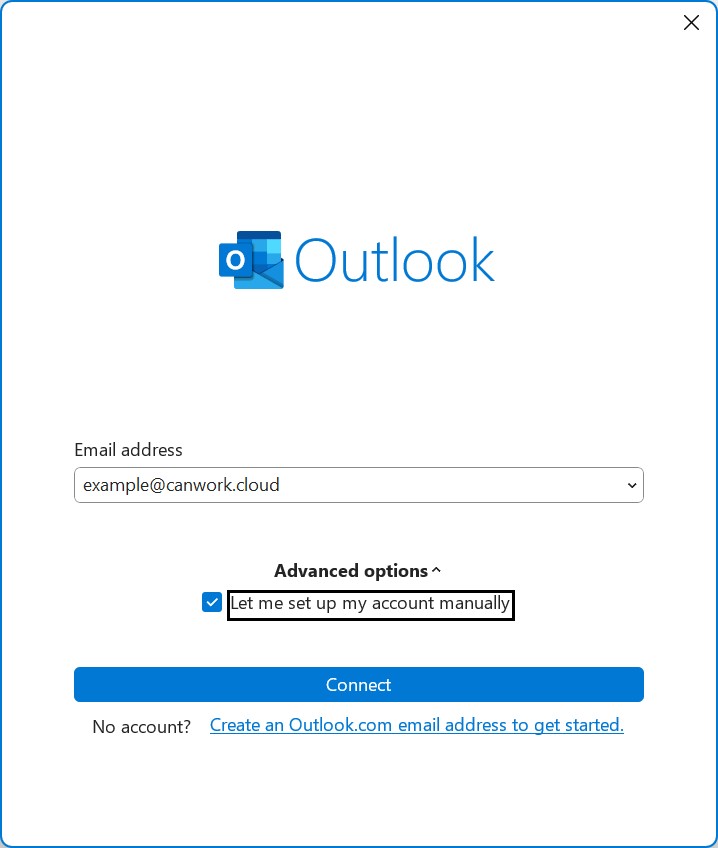
Fill out new email dialog:
- Enter your email address
- Expand “Advanced options” and check “Let me set up my account manually”
- hit “Connect” at the bottom
4
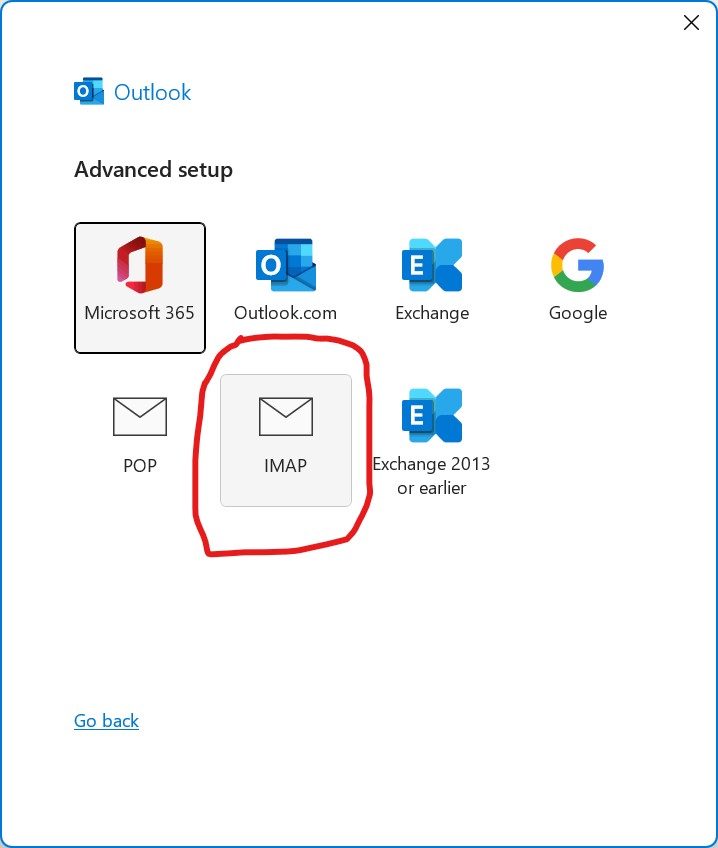
Choose “IMAP” icon in the Advanced setup dialog:
5
Enter password to “IMAP Account Settings” dialog and hit “Connect”
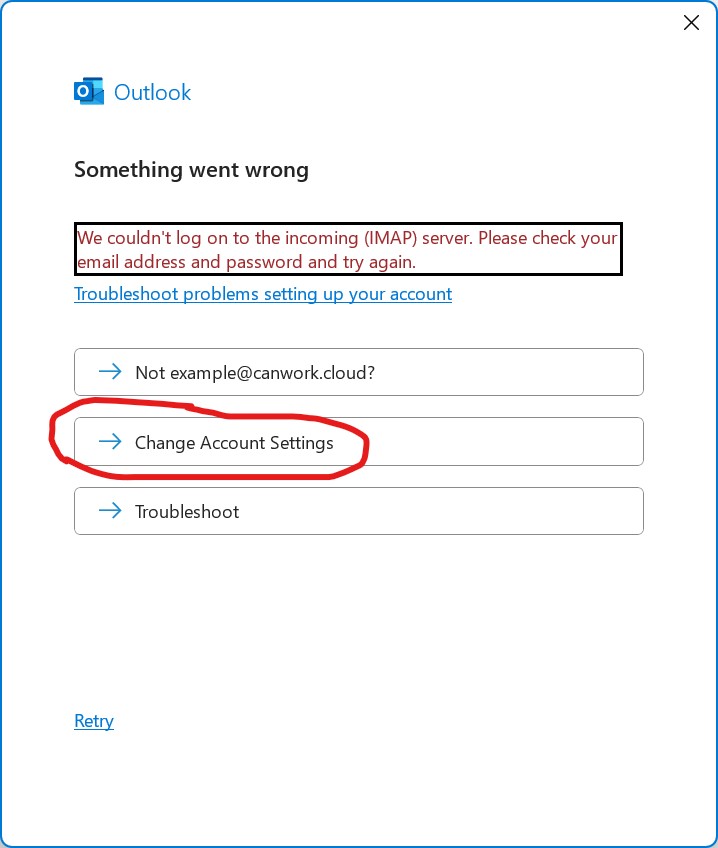
- Outlook will say “We’re getting things ready” but fail to fully configure.
- Press “Change Account Settings….”
Outlook may try to auto-correct, or might show you your settings right away.
6
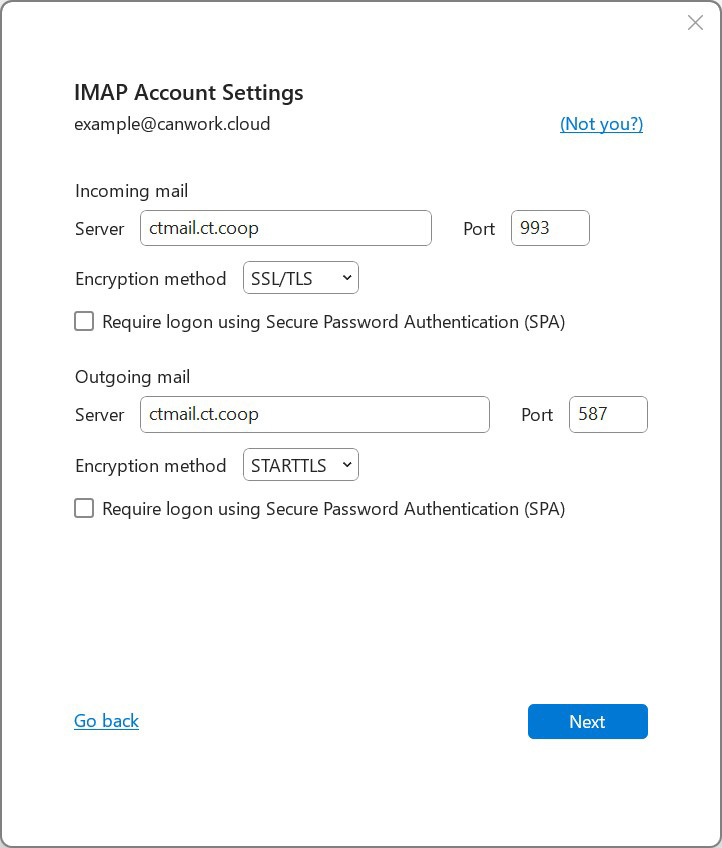
Set the correct IMAP Account settings:
- Server: ctmail.ct.coop Port: 993
- Encryption Method: SSL/TLS
Outgoing mail:
- Server: ctmail.ct.coop Port: 587
- Encryption Method: STARTTLS
- click “Next”
7
Re-enter your Password if necessary (IMAP Account Settings second dialog)
- Hit “Connect” to finish adding the account.
- If the add account screen stays up, press “Done” to finish off and get back to your email client.