All Production WordPress sites hosted at CanTrust need to have an effective caching plugin installed.
What is “caching” and why does my site need it?
By default WordPress has no caching. This was just fine when WordPress was being used to display simple blogs, back in the early 2000s when blogs were an exciting new technology. But now that WordPress does much more complicated things, it presents problem.
Without caching, every time a human (or a bot) comes to your website to load a page, WordPress has to build the entire page from scratch. Then once the page is built, it presents it to the user, then it throws it away.
A real world analogy
In the real world this would be like a store owner building a store from the ground up, then filling it with stock on all the shelves, hiring staff and so forth, then allowing just a single customer through the door to shop at a time. When that customer leaves, the wrecking ball demolishes the entire store right back to the foundation. Then the entire process repeats for the next customer: The store is built from the first brick and stocked and staffed, then one customer is let through to shop, then it’s demolished again.
This inefficiency becomes a real problem if your site becomes busy!
Caching must be pro-active
Your site can easily get busy from factors beyond your control. Here are some common reasons:
- a steady build up of users over time
- a marketing campaign is especially successful or you make the evening news
- something goes viral in social media that links back to your site
- marketing / spammer botnets trying to scrape all your site content for their databases
- hacker botnets trying to break into your site or perform security scans on it.
If your site becomes busy then the rebuilding-everything-from-scratch method will not work any more. The site will overload and stop working and go down, every time, without fail.
In order to protect against this, you need a proactive system (versus reacting to outages afterwards, when it is too late). That is where caching comes in!
Our real world analogy, with caching this time
Here is how our analogy works using Caching. It is as you expect in the sane real world:
Build a store, staff it, then let customers in without demolishing/rebuilding each time.
In fact, it turns out we were building the same store for everyone each time… so we can actually safely have multiple customers inside at once!
The entire lineup can come in at opening time and shop together and be out the door again so much faster, because we are not recreating everything each time.
How caching plugins work in WordPress
A caching plugin accomplishes this idea in WordPress saving (aka “caching”) the entire website page that was just built, right before it is delivered to your web browser. Then, when another user comes along looking for that same page, they can be served the already-built page instead of having to build one from scratch.
Most plugins cache ready-to-go pages by saving HTML files inside wp-content/cache on the server. W3 Total Cache can go further than this by caching in memory using Redis or Memcached.
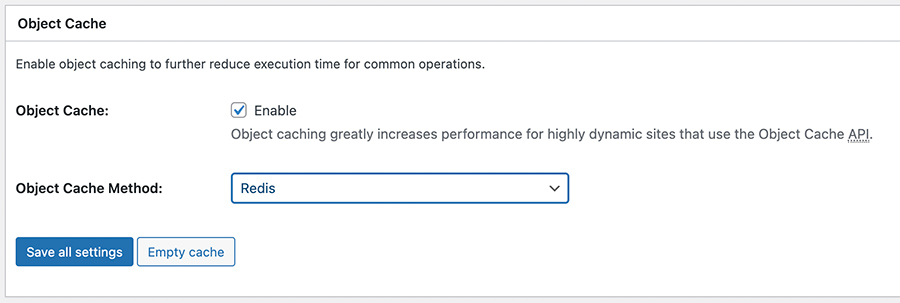
On top of caching web pages themselves, there is also an internal WordPress Object cache that is helpful to have enabled. Just like the pages, WordPress can cache internal objects it uses to build pages. This speeds up the WordPress back end for logged in users.
Recommended Caching Plugin
We recommend W3 Total Cache as a caching plugin, because it provides everything needed and it is compatible with Redis and Memcached memory-backed caching.
- it provides page cache, and is compatible with the popular Yoast SEO plugin
- it provides WP object cache to speed up things in the backend
- it provides CSS/JS minification (if your theme is not doing that for you)
- it is capable of caching to memory caches (Redis or memcached), which are much faster than caching to disk files.
Other similar caching plugins that will work and provide Page cache:
- WP Rocket
- WP Super Cache
If you are already really attached to using one of the above, or another caching plugin entirely, that is OK, as long as you have something in place.
Only W3 Total Cache works with Redis and Memcached, and those are up to 1000 times faster than a disk cache, so in our opinion it’s the clear winner.
W3 Total Cache Setup
- First, ensure that you have a WP_CACHE_KEY_SALT set in your wp-config.php file. This is default for new WordPress installs in 2022 and beyond:
# add this line after your database information and the other WP salts, if no WP_CACHE_KEY_SALT is set.
define( 'WP_CACHE_KEY_SALT', md5(DB_USER . DB_PASSWORD . DB_HOST . DB_NAME));
- Install and activate W3 Total Cache plugin: https://wordpress.org/plugins/w3-total-cache/
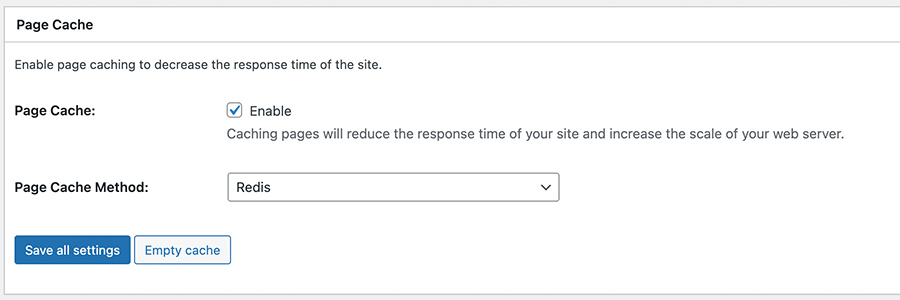
- Go to Performance->General Settings
- Page Cache: Enable (Redis). or if Redis not available, use Memcached
- Object Cache: Enable (Redis). or if Redis not available, use Memcached
- Miscellaneous : Uncheck Enable Google Page Speed dashboard widget
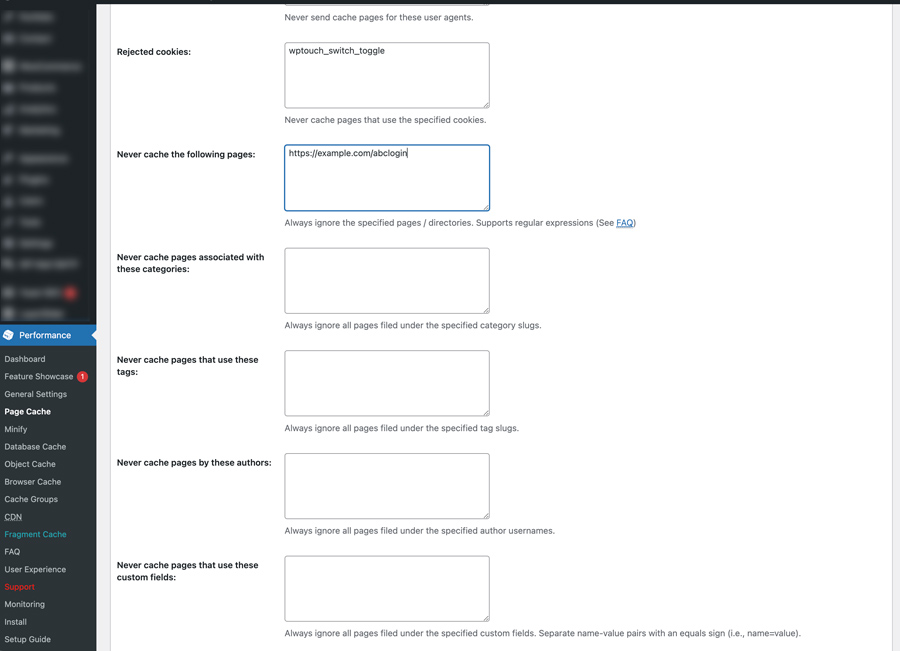
- go to Performance > Page Cache
Under: Never cache the following pages: add your security plugins’ hidden login URL with .* after it: (e.g. abclogin.* for https://example.com/abclogin)
- goto Performance (on the left side this time)> Page Cache.
- scroll to Advanced > Never cache the following pages.
- If appropriate (ie. your theme isn’t doing it already), turn on CSS/JSS Minification up near the top. But if you do, be sure to TEST everything afterwards, it can break plugins!
Clearing the cache
When you change pages in the editor, W3 will clear the cache for them automatically. 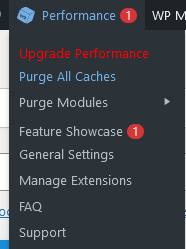
But if you are making changes to your website code, like editing your theme or adjusting plugins, then you need to clear the cache out afterwards. W3 will detect many of these changes and prompt you in a blue bar at the top of your site to clear the cache.
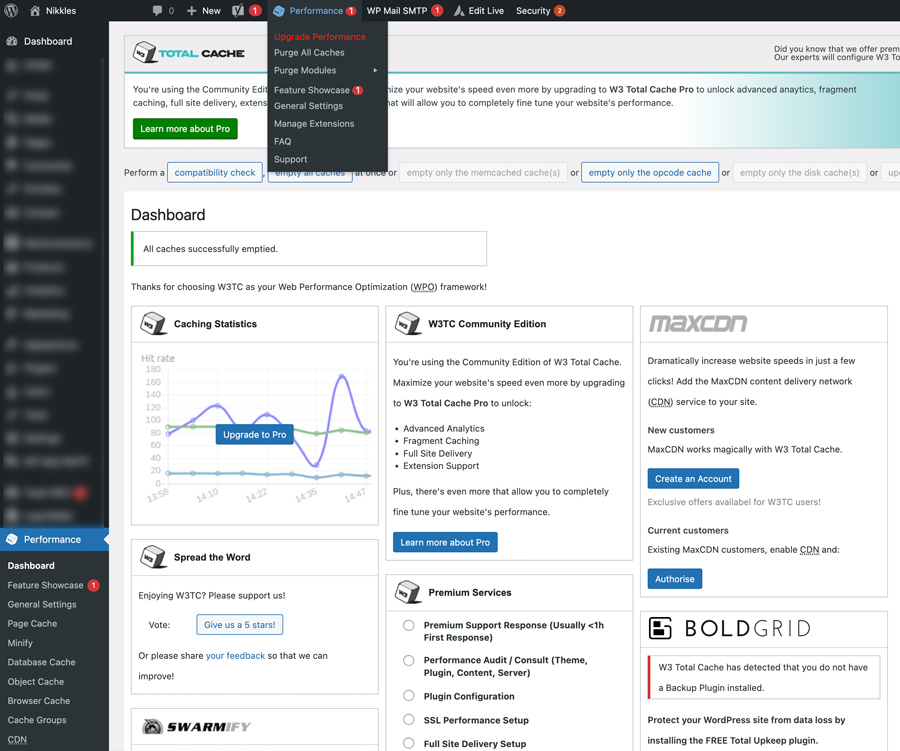
But any time you want to, you safely can and should claer the cache using Performance -> Purge All Caches, from the “Performance” menu at the top of the worpress backend admin bar. This is not to be confused with the other Performance settings menu on the left.
To clear the caches, use the “Performance -> Purge all Caches” menu option, which is at the top of your site.
Testing the cache is working
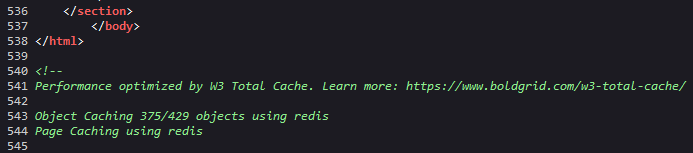
Once the cache is activated, W3 will place a HTML comment at the end of each page on the site, which has statistics about the cache.
To test things out, you first need to become a logged out user. The easiest way to do this is to open a private browsing tab. You can also fire up a different (not logged in already) web browser.
Once you have a logged out browser, proceed to any page on your website and load it. Refresh the page a 2nd time to make sure you are seeing the cached version. You may notice a huge speed jump on the second and subsequent refreshes; this is the cache doing its thing!
Now in your browser, view the HTML Page Source (in Firefox or Chrome Right click -> View page source).
Scroll down to the very bottom of the HTML source and you will find a comment put there by W3. You want to see that both Page Cache and Object Cache are mentioned. It should look like this screenshot:
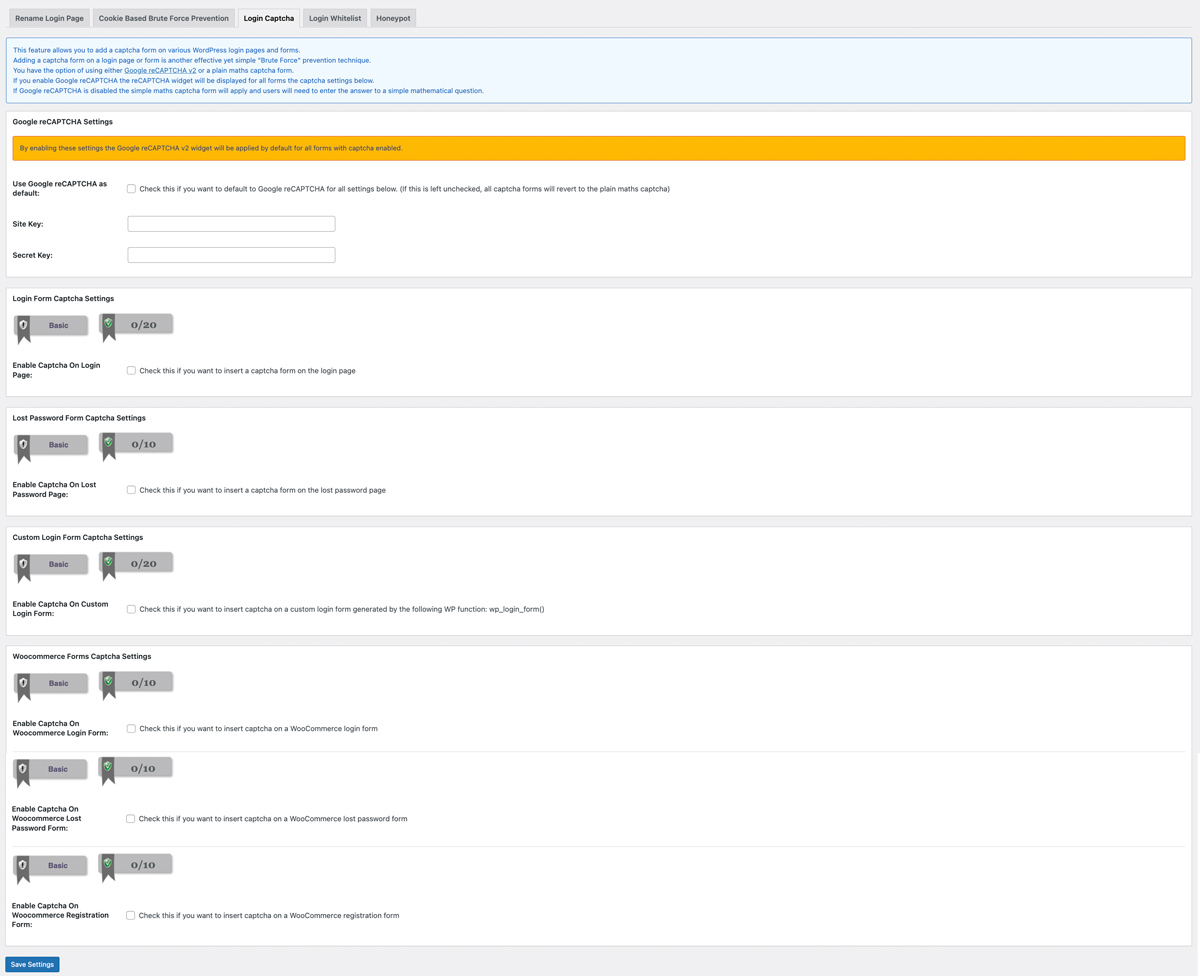
Warning with Captcha
Caution using Captcha and Recaptcha on User Login, until you know everything is set up correctly. You can accidentally lock yourself out of your site, if your Captcha is not connected properly.